The New York subway system can seem very overwhelming at first – that multi-coloured map with it’s criss-crossing lines looks like a bit of a mess. I had so many questions about the subway when I arrived in New York. How was I going to buy a ticket? How would I know which line to take? What if I get lost?
But don’t worry! The subway is a fantastic, reliable, and, most importantly, user-friendly mode of transport that will get you around New York City with no hassles.
Map of the New York Subway System
The subway map features all the subway lines that service both Manhattan and the outer boroughs. Yes, it looks confusing at first, but it’s actually handy to have every line on the same map. Each subway line is denoted by both a colour, and either a number or letter. For example, the line I took most often when I was in New York was the ‘green line’; or the 4, 5 or 6 train. You can see it on the east side of the map above.
What you need to know
As you can see, most lines travel either uptown or downtown Manhattan, rather than across town. There are a few exceptions, including the seven train, but it is always more difficult to travel across town than it is to just travel straight up and down the island. Use the subway to travel uptown or downtown, and then you can easily walk across town to wherever you want to go.
But how do I pick the right station?
It’s easy. Locate the nearest subway station to you, and check out the sign on the front of the station. It will have the name of the station, (for example: 56th Street), followed by the colour and number/letter of the lines that service the station. Most importantly, the sign will say whether the trains at this station are travelling uptown or downtown. Don’t worry, if you find yourself at an uptown station, it’s downtown counterpart will be close by – usually across the street, or at most, a block away.
Important Tips
Download the app ‘NYC Subway‘ app – it is a fantastic guide to the subway system. I used it when I was in New York, and it features the all important subway map, service updates and a route planner. I highly recommend it.
You might make mistakes, and that’s okay! Everything is well signposted, and most stations have station-attendants to help
Don’t get overwhelmed. Remember that you will more than likely just be travelling up or down Manhattan. If you make a mistake, it is easy to get off the train and simply go back in the other direction.
If you are planning on making good use of the subway, purchasing a weekly ticket is more cost effective than several daily ones.
Every station is well signposted, so you won’t be stuck on a train wondering where you are.
Let me know your best Subway tips and tricks in the comments below. I’d love to read them!
Not sure what to pack in your carry-on, and what to pack in your checked luggage? Read on below for my list of carry-on essentials!
1. Travel Documents
An obvious one; you need your travel documents and this is the place to put them.
2. Medication
If you take any sort of medication, it is so important that you pack it in your carry-on to keep it with you at all times. One of my fears when travelling is that my luggage will be lost on the way to my destination, and I will be without the things I need; including my medication. Keeping your medication on you will avoid you having to go without, just in case your luggage does go missing.
3. Travel Diary
I have a tradition for the plane every time I travel. I board the plane, get settled in my seat, and after take off, before even turning on my entertainment screen, I start writing in my travel diary. I write about how excited I’m feeling, what the check-in and boarding was like, and everything I’m excited for about my destination. I’ve never regretted the small amount of space it takes up in my backpack, and I think it’s a nice idea to be able to record the very beginning of my trips.
4. Spare Clothes
This is part of my contingency plan for lost luggage – since it’s always possible that your luggage could be lost by the airline, I always pack some spare clothes in my carry-on. I don’t usually pack a full outfit; just something that can be worn as pajamas, or that I can change into if needed. A spare top, and pair of soft pants can really get you out of a bind if your checked luggage does go missing for a day or two.
5. A Book
If you’re taking a book with you on your trip, (which I will always recommend you do), you won’t regret taking it on the plane with you. I appreciate having my book with me on long haul flights especially, to break up my screen-time, and to give me something new to do on a long flight.
There you have it – my list of carry-on essentials. I’d love to know what you take in your carry-on – let me know in the comments below!
Last year we spent a day at Magic Kingdom. Yes, it was just one day, but between our days at Universal Orlando, and the time constraint of our next destination, (San Francisco!) this was all we could fit in! We made the most of our day though, staying from rope-drop to fireworks, and cramming in as many rides and attractions as possible.
So, how did we do it?
We went in armed with the Fastpass+ System, and a plan of attack that included our must-do rides and experiences. Having already chosen our Fastpasses+ we already had a general plan of where we needed to be and when, so all we needed to do was fill in the blanks.
Importantly, we left time for rest breaks and for spontaneity, so that we wouldn’t feel as though we were following a regimented schedule on holiday!
What our day looked like
Our day started as everybody’s does – with a walk down Main Street. We headed towards the Castle, and stopping for some pictures before heading into Fantasy Land. We had our first Fastpass+ at It’s a Small World, so we explored Fantasy Land before boarding our Small World boat, and ticking our first must-do ride off our list.
After riding the Tea Cups, we headed into Tomorrow Land, where we rode Autopia and the People Mover, before stepping back into Fantasy Land to brave the lines for the Carousel. Feeling a little strange amongst all the children with their parents, we made it onto the Carousel, and were glad in the end that we waited out the line. Laura’s choice was Under the Sea – for her favourite Disney film, The Little Mermaid. We were grateful that we applied sunscreen that morning, because part of the line offers no shade from the harsh sun.
Our next Fastpass+ was for the Jungle Cruise, so we made our way over to Adventureland, where we visited Pirates of the Caribbean and explored the Swiss Family Treehouse while waiting for our time slot.
After grabbing some popcorn for lunch, (we were saving our money for a quick service dinner), we grabbed spots for the parade, which were fairly good considering we only got them about fifteen minutes before the parade started. One of Laura’s favourite Disney traditions, the Parade was spectacular as usual.
With the parade done, we were losing stamina after so long on our feet. We trudged back to Tomorrow Land with Space Mountain in mind – another one of our must-do rides. We weren’t to be swayed by the two-hour wait time, instead stopping off at a kiosk to pick up some slurpees to drink while waiting in line. This idea proved to be great – the drinks cooled us down as we waited out of heat, and made the sometimes stagnant line a little bit better. You can read about Space Mountain here.
When we got out of Space Mountain, dusk was approaching and we headed over to our net Fastpass+, The Haunted Mansion, which you can read about here. We found ourselves back in Fantasy Land for an early dinner at Pinocchio’s Village Haus. The food was nice and inexpensive, and we were definitely glad to off our feet for a while.
Fueled up and ready to go again, we walked to Frontier Land to ride Big Thunder Mountain Railroad. We found this queue to be the hardest of the day, as it proved to be a colossal wait time in a confined, almost airless space. We both agreed that the wait was worth it, though, for the thrilling rollercoaster that turned out to be one of the best rides of the day.
By the time we exited the ride, night had fallen, and it was time to get spots for the fireworks. After a little souvenir shopping on Main Street, we took our placed to watch the fireworks. Kate had never seen Disney fireworks, and we both agreed that they were spectacular, and one of the highlights of the day.
We both agreed that after the fireworks were over, it was time to call it a day. We went to the Starbucks on Main Street and got Iced Tea for the ferry ride, and made our way out of the park.
Short and sweet, our Disney was exciting, and full of colour, light and music. Laura got her Disney fix, Kate saw Disney for the first time, and we left exhausted, perhaps a little sunburned and filled to the brim with Disney magic.
What is your favourite Disney memory? Let me know in the comments below!
There are so many ways to explore the real New York City that are actually free! Keep reading to discover some of my favourite free things to do in New York.
Explore Central Park
This is such a fantastic thing to do in New York, and the fact that it’s free is just a bonus. Central Park is just massive, it could take several days to explore the whole thing, which can make it a little overwhelming to start with. My approach has always been to explore Central Park bit by bit; taking it easy and enjoying whatever I have time to see while I’m in New York.
There is something for everybody to see in Central Park. Book lovers can take a stroll down the Mall and Literary Walk, and music lovers can discover Strawberry Fields – the tribute to the Beatles’ John Lennon, who was assassinated blocks away. Take kids, or the young at heart to the popular statue of Alice in Wonderland, or the nearby Hans Christian Andersen. You can watch the boaters on the lake at the Loeb Boathouse, check out the famous Central Park Carousel, and explore Belvedere Castle, a victorian folly right in Central Park.
Whatever you do in Central Park, I know you will love it like I do; sprawling and beautiful, rambling through Central Park is one of the best ways to explore New York.
Visit the New York Public Library
This is a fantastic way to spend an afternoon. The New York Public Library is open to the public, and there are some interesting things to be found there; see the first Guttenberg Bible in the new world, visit the library’s free exhibitions, or see the real life toys that inspired AA Milne’s Winnie the Pooh, in person. This library is a must-see for any book lover, if only for the fantastic gift shop and the stunning architecture. Put it on your itinerary – you won’t be disappointed.
Walk the Highline
Built on the tracks of a disused railway system, the Highline is now a beautiful walking trail 30 feet above the Manhattan streets. This perspective makes for some terrific and unique views of New York City, and the walk itself is both low-impact and lovely. The entire length of the Highline is 2.33km, stretching from the Meatpacking District to West 34th Street, between 10th and 12th Avenues. My advice: put on your walking shoes, take yourself to the Meatpacking District, and take a nice stroll down the whole length of the Highline, stopping at all the lookouts, and taking in this unique perspective on New York City.
Ride the Staten Island Ferry
Riding the Staten Island Ferry is a fantastic – and free – way to see the Statue of Liberty! You could spend a fortune paying a very pushy tour company to take you onto Ellis Island, and (possibly) up to the viewing part of the statue. Don’t get me wrong; this is worth doing once in your life. But if you are in New York for the second time, or are strapped for cash, then taking a trip on the Staten Island Ferry is such a terrific way to get closer to Lady Liberty.
The Staten Island Ferry is a free ferry to – you guessed it – Staten Island. The ferry leaves every 30 minutes from the Whitehall Ferry Terminal, and travels to Staten Island, where you will need to disembark. You have the option of staying to look around Staten Island, or you can get straight back onto the ferry for the return trip. The ferry is a great opportunity to get some sunshine, as well as some terrific photos of the Statue of Liberty, as well as some unique ones of the New York skyline from the water.
It’s a lovely way to spend a morning – standing on the deck of the Staten Island Ferry, on the water, watching the iconic Lady Liberty grow nearer. I highly recommend taking the subway down to the financial district and riding the ferry – it’s such a valuable free service, and you won’t regret the spectacular views you get from the water.
Top-Tip: As you approach the Ferry Terminal, there will be hawkers from the expensive Statue of Liberty tour company’s. They will say, (or shout), anything to stop you from seeing the Statue of Liberty for free; including that tourists aren’t allowed to ride the Staten Island Ferry: Don’t listen to them. Tour company’s station hawkers at the ferry terminal to trick unwitting tourists into paying for unnecessary tours, but the Staten Island Ferry is a completely free service available to anybody who wishes to make use of it. Just keep walking, and enjoy the free ride you are entitled to!
Walk across the Brooklyn Bridge
Haven’t you always wanted to walk all the way across the Brooklyn Bridge? I have – and last time I was in New York, I did it! It’s a fantastic way to spend a sunny afternoon, and I highly recommend it to anybody wanting to see the city from a different perspective.
The pedestrian walkway of the Brooklyn Bridge is 2.09km long, and a slow walk all the way from Manhattan to Brooklyn should take about 45 minutes. It’s important to be aware of how crowded the Brooklyn Bridge can get, mainly due to it’s popularity with tourists. I would make sure to avoid peak times, when New Yorkers use the bridge to get to and from work, and be aware that you will probably be sharing the bridge with hundreds of other people, no matter what time you go.
My advice: take yourself down to the financial district mid-morning, hop onto the bridge, and go for an easy stroll all the way to Brooklyn. Make sure to take in all the sights from the bridge, don’t let the crowds deter you, and spend the rest of the day exploring Brooklyn!
There are so many fantastic and free things to do in New York City – it can actually be a really budget friendly city. I would love to hear if you have enjoyed any of the free things on this list, or let me know below your favourite free thing is to do in New York!
Oahu: this is the Hawaii you imagine when you dream of Hawaii. Possibly the most popular destination in Hawaii, Oahu is home to stunning beaches, beautiful natural scenery and fantastic shopping and dining experiences. There are so many natural wonders to be found on Oahu – look out of your hotel window to one side and you will see the bluest ocean, and to the other, luscious green mountainside. Oahu really is a spectacle of colour and natural beauty.
View of Oahu from top of Diamond Head
Oahu has something to offer everybody; from nature lovers and shopping addicts, to history buffs and foodies. The main strip offers great shopping and dining, Pearl Harbor is a moving experience for anyone who has studied 20th Century history, and the Diamond Head and Waimea Valley offer an interesting and authentic cultural experience for those interested in Hawaiian culture and history. Oahu is a place for families, couples and group of travellers, as well as solo-travellers, who will be welcomed by the naturally friendly Hawaiian locals.
Have you been to Oahu? What do you love about it? Let me know in the comments if you love Hawaii, or if you’d love to go!
When travelling solo there are a few things that you need to make sure everything goes as smoothly as possible and ensure you have a great (stress free) time. Here are a few of my essentials for travelling solo.
1. A Money Belt
My money belt has been used so much it’s just about falling apart. Having somewhere to store larger amounts of cash, a spare bank card and my passport, on my body and where I’m less likely to be robbed is crucial to me, especially when I’m travelling alone. I know it can get a little sweaty, especially on those hot summer days in Europe, but just the thought of having to replace my passport in a foreign country is horrifying. In my opinion the security is worth a little discomfort.
2. A Combination Lock
If you’ve ever stayed in a hostel you’ll know they’re not always the safest environment for your belongings, which is why they often provide lockers for you to store your things and more often than not it’s BYO lock. A combination lock is handy because there’s no chance of losing the key (although there’s always the risk of forgetting the combination, I recommend you set the combination to something you’ll easily remember or store that information in your phone).
3. An Offline Map App
When I travel I generally don’t bother getting a sim for that country or pay the extra money for roaming on my phone. Pretty much wherever I stay will have free wifi and there’s usually a McDonalds or Starbucks around that I can go to get online if I need to. The biggest downside to not having data to use on my phone is not being able to use the Maps app. So when I go to a new city I always go to the App Store and search for an offline map for the city I’m visiting. There isn’t one for every city in the world but all the major ones are pretty well covered. My go to is Ulmon CityMaps2Go which allows you to search and pinpoint locations without wifi and they have an app for cities such as London*, Paris*, Tokyo, Brussels, Singapore, Venice, Hong Kong, Barcelona, Berlin, Amsterdam*, Dubai, Los Angeles*, Prague, Vienna, San Francisco*, Florence, Munich, Chicago* and more. These maps also contain a map of any public transport in that city, for example the Underground in London and the Subway in New York, which will also help you greatly in getting around. Also all Ulmon apps are free and most others are free to download as well.
* denotes the apps that I’ve personally used and can recommend (though all Ulmon apps, in my experience, follow the same format).
4. Emergency Money
When I travel I carry an Australian $100 note, folded up and hidden in my phone for emergencies. If there’s a time that I need money and my bank cards aren’t working for some reason (or I’ve lost them) I have some money that will get me out of most situations, whether I need to take a taxi somewhere or go to a doctor or pay for a night in a hostel that money is there and I can find a bank or a currency exchange place to get the money converted easily. I’ve never had to use it so far but it gives me peace of mind having it.
5. Reading Material
When you’re travelling alone there’s a lot of downtime in airports, on planes, trains and buses that needs to be killed. In transit is a great place to get some reading done. Bring along a paperback that you won’t mind leaving in a hostel or donating to a charity shop or library. If you have an e-reader then you can load all the books you want on there and you’re good to go. You could also look into e-books or audiobooks that you can read/listen to on your phone. I use an app called Borrow Box, which I use through my library membership and allows me to borrow e-books and audiobooks for free, which is a great, budget-friendly alternative to having a Kindle or an Audible membership.
There you have it, a few of my essentials for solo adventures. What are some of your travel essential? I’d love to hear about them.
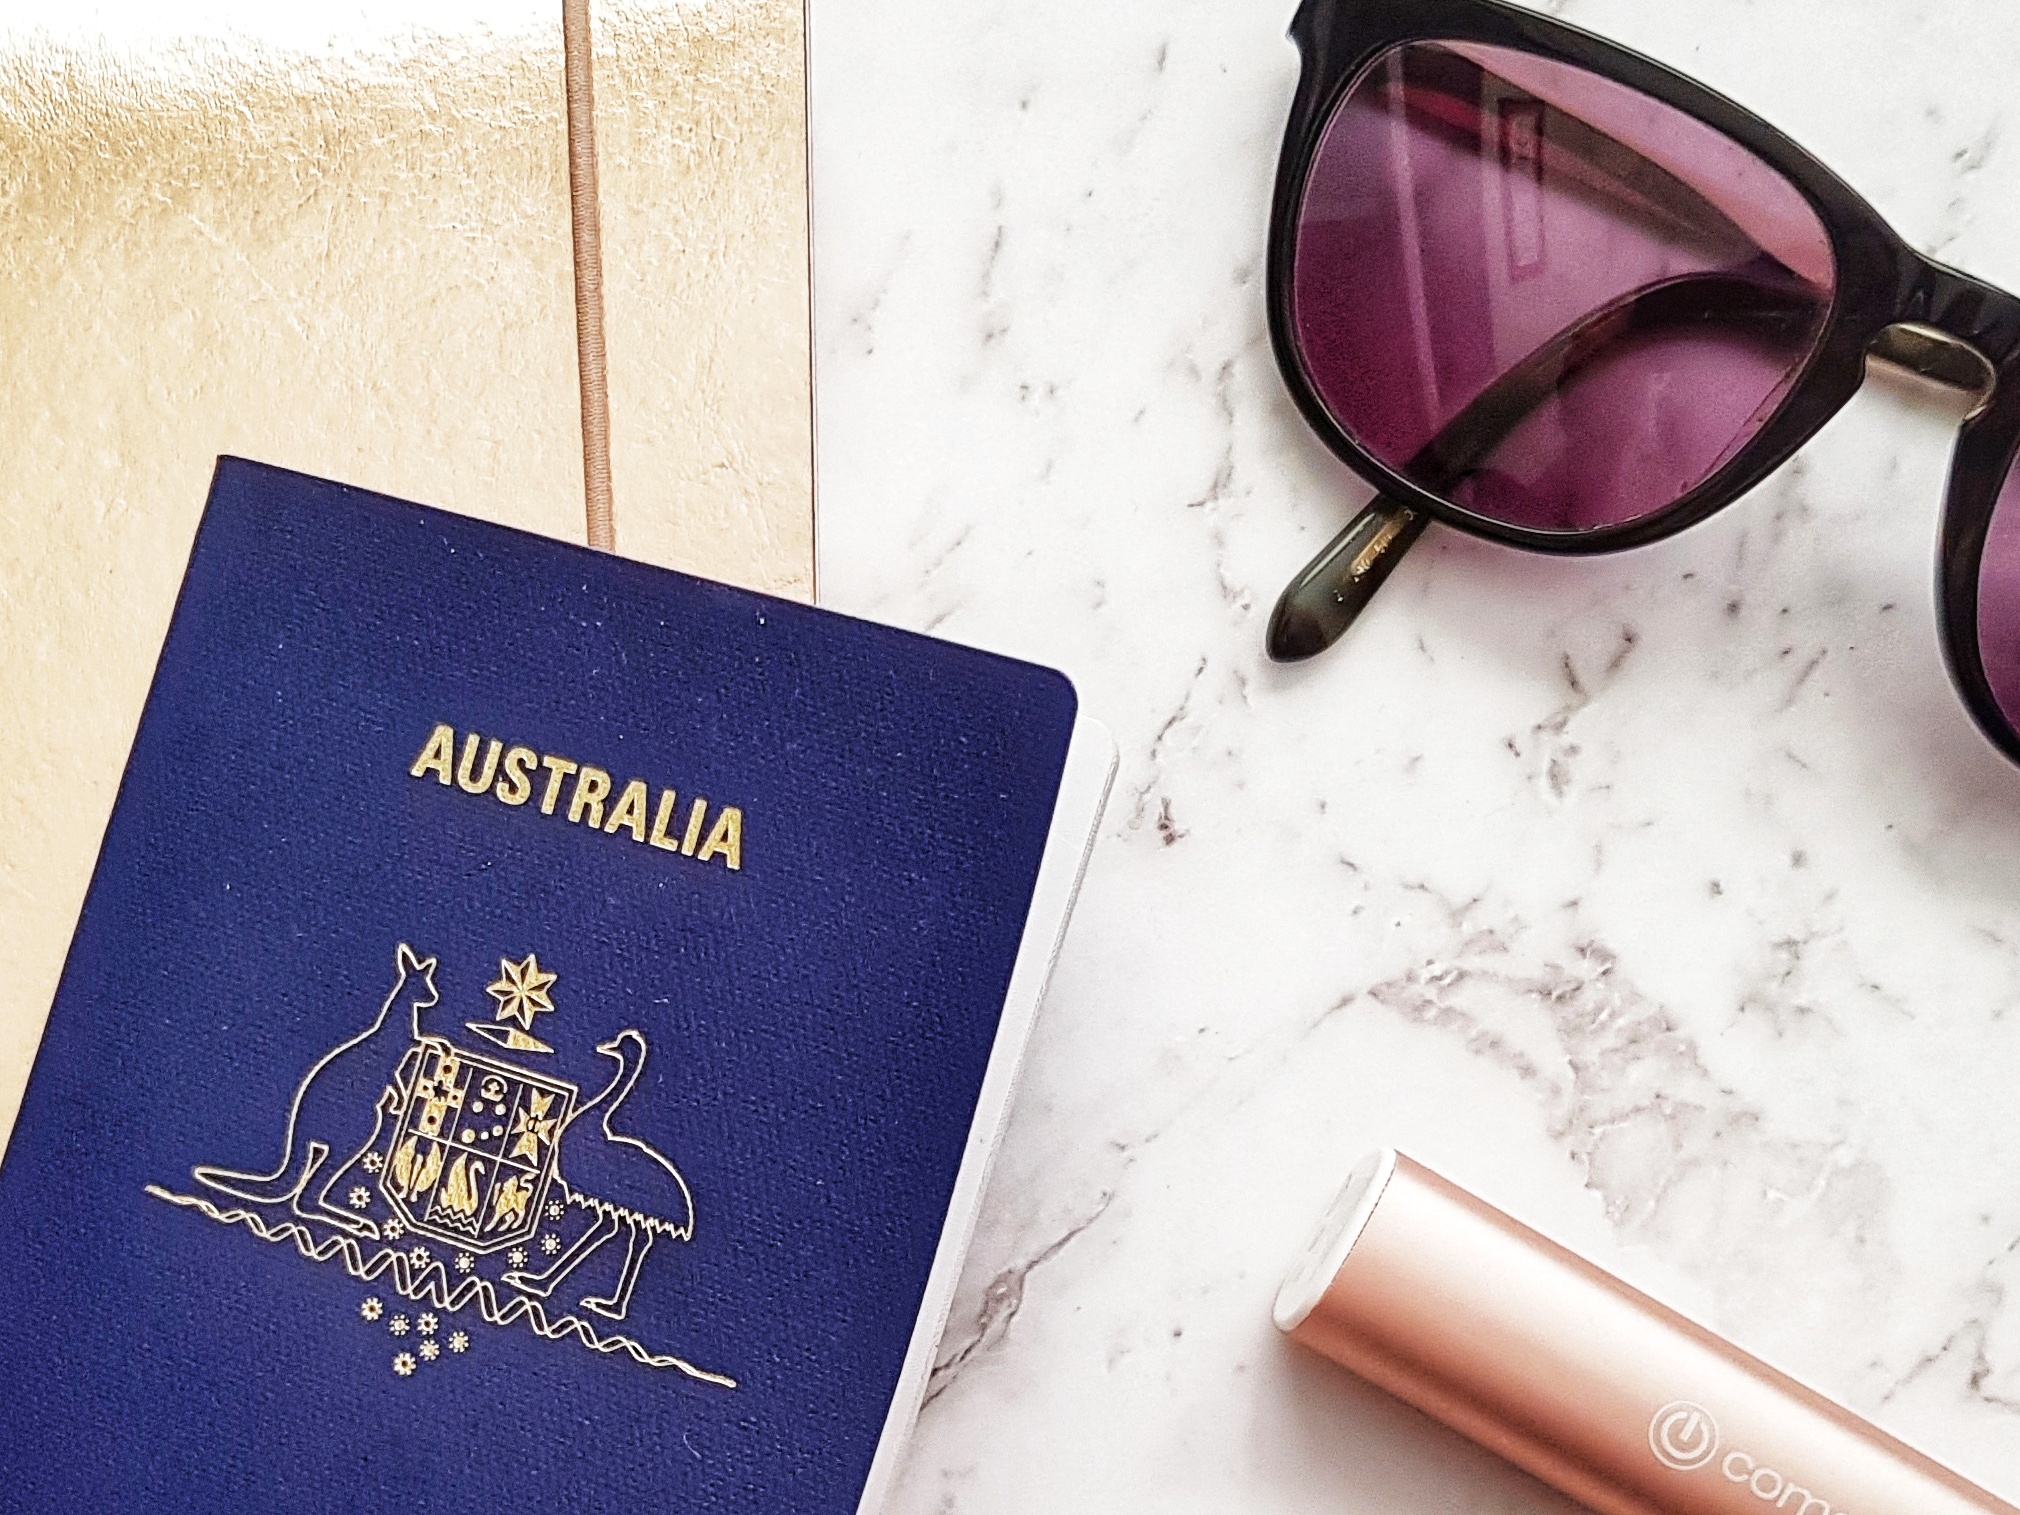
There are so many travel accessories out there, sometimes it can be hard to know what you really need. Here is my list of must-haves for travelling comfortably and well!
Packing Cubes
I was skeptical about packing cubes to begin with, but now that I have used them, I would never travel without them again. Packing cubes are fabric cubes with zips, that you pack your clothes into before putting them in your suitcase. They lay flat in your luggage, keep your clothes folded nicely and compactly during travel, and they save a lot of room. Packing cubes are great for keeping alike things together; for example, keeping all your tops or pants together, and they are easy to move around when you need to find something quickly. Pick up your own set of packing cubes; even if it’s only three or so, and see how much easier it makes travelling.
A Luggage Tag
This is essential for your luggage. It doesn’t have to be a fancy tag, or an expensive one; it just needs to have space to write your contact details on, so that should you be parted from your luggage, it is identifiable. It helps if your luggage tag is a unique shape or colour, as this makes it a bit easier to find your luggage on the carousel. It is also handy to have a luggage tag on your suitcase in the event that your luggage does get lost; you will need to be able to describe your luggage for the airline, and it helps to have another identifier, like ‘red luggage tag’, to put on the form.
Document Wallet
When I travel, my document wallet is the first thing that I organise and pack; I would never travel without one. Documents wallets are an easy way to keep all your travel documents together, and being the person that I am, I find it comforting to have just one thing to reach for in my bag that holds everything I need. Something I know about myself is that I can get frazzled easily in airports, and having a place to keep my boarding passes, passport, visas, as well as my itinerary and insurance documents, really eases my nerves. Again, it doesn’t need to be an expensive leather document wallet, it just needs to be big enough to fit all your documents, and be nice and secure, with a button or zip.
Portable Charger
Portable chargers are terrific to just throw in your bag, even if you think you’ll never use it. They don’t take up much space, are inexpensive to buy, and can get you out of a no-charge-situation, fast. Compatible with most phones, portable chargers hold a certain amount of charge, which you can use to give your phone’s battery level a boost – usually between 80-100% extra charge. I have found my portable charger to be a lifesaver to have in my bag for those times during travel when you can’t really charge your phone. Pick one up and pop it in your bag; even if you don’t end up needing it, it will give you some peace of mind that you can charge your phone quickly if you really need to.
There you have it – my travel must-have’s. Let me know below what your must-have travel accessories are – I’d love to know what you can’t travel without!
Hello and welcome to Xen. a travel blog run by two friends and xenomanics, Laura and Kate. We just wanted to share some of our travelling stories and tips as we go on our adventures.
We would love to hear from you! Let us know the best place you’ve travelled to or where is on the top of your list. Get in touch in the comment section below, on our contact page or email us at xenomania18@gmail.com. Let’s talk about travel!